FULL DISCLOSURE : The “Digitally Controlled Soldering Iron (VTSSC40NU)” below was received as a gift from The Velleman Store. No special consideration from this article was given to this device as a result of this gift.
This is a slide show, please click the image below to start.
[BMo_scrollGallery id=41 sG_thumbPosition=bottom sG_images=1 duration=slow gallery_width=600 gallery_height=400 thumbs_width=100 thumbs_height=100 sG_caption=1 sG_start=1 sG_loop=1 sG_loopThumbs=1 sG_clickable=1 sG_opacity=60 sG_area=200 sG_scrollSpeed=0 sG_autoScroll=0 sG_aS_stopOnOver=1 sG_diashowDelay=50 sG_followImages=1 sG_responsive=1 ]
I have had soldering irons for a little over a year and I love working with them. I think that if you are buying a second soldering iron for a kid and you know they are a maker, you should skip the middle step soldering irons and go all the way to a digital controlled model. If you are buying someones first soldering iron I suggest the pencil-type ones that are sold everywhere.
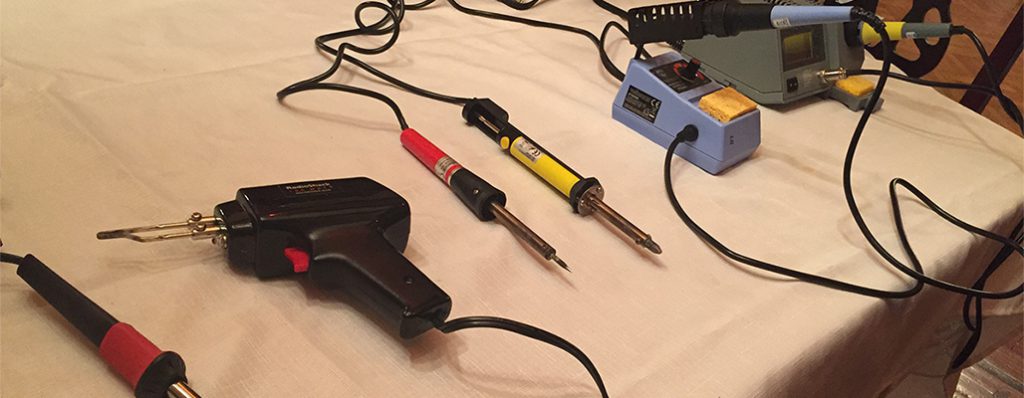
The de-soldering iron was really exciting to get, but was a let down. It’s a little rough on the circuit board when you use it, and that’s a big problem when pads come off easily. The copper de-soldering braid worked better in most cases, and just using a soldering iron to gently scrape away solder works better in most cases. Everyone wants one when they see it, but you can skip the desoldering iron if you want.
I liked the way my first Radio Shack handled, it had a triangle grip, but it was not constant with it’s temperature. I learned about how to take care of a soldering iron because of the mistakes I made with this one. I did not clean it well enough or tin it enough… okay, and I melted some candy on it once. We never could find another tip that fit it, so it sits here. An old favorite.
I kept getting better ones every few months, and I can really see the difference between them all now. I was really excited to get the pistol-style one as a gift, but was disappointed by it – maybe I need to find a job that fits it.
My latest soldering iron is my most favorite soldering iron too. Check out my unboxing post for the Velleman Digitally Controlled Soldering Iron. It’s been used now for three projects, the Covered Crawling Microbug, and the Enclosed Vu Meter as well as a school project. It keeps a good temperature and I can see when it changes. If you treat it well and clean it and tin it as you use it, then it makes really good solid solder dots. We are getting SMD tips for it now and I will do a post all about how to SMD solder – just as soon as I learn!!
I have used soldering to solve problems in real life now too, I’ve even used it in school projects that seem unrelated like English. Ever see a diorama with an LED light and a controller board to bring it to life? It works. I guess some of my friends and family think of me as being a maker now, and I see myself that way too.
Every kid should try out soldering. Get a maker badge or a simple learn to solder kit. If you do, start small and don’t spend too much on the first project. My first little soldering iron was almost completely destroyed by the time I learned how to clean and tin and take care of it. Knowing which iron to get and which iron to use seems like it might be confusing, but it’s not so tough.
If you know a kid who is already a maker, who is still using their first iron from a kit? Upgrade them sooner rather than later.
For first time users the Velleman Soldering Starter Kit comes with the perfect starter soldering iron. For classrooms and maker groups the VTSS5u 50w soldering station was great for me for months of constant use.
For any maker, kid or adult who has gone beyond the basic kits, don’t wait. Upgrade to a nice digital controlled station like the Velleman VTSSC4NU because being able to use smaller solder, and being able to use less of it means being more exact. To be exact and to always know when it’s the right time to solder is really really important to moving on to the next level.
